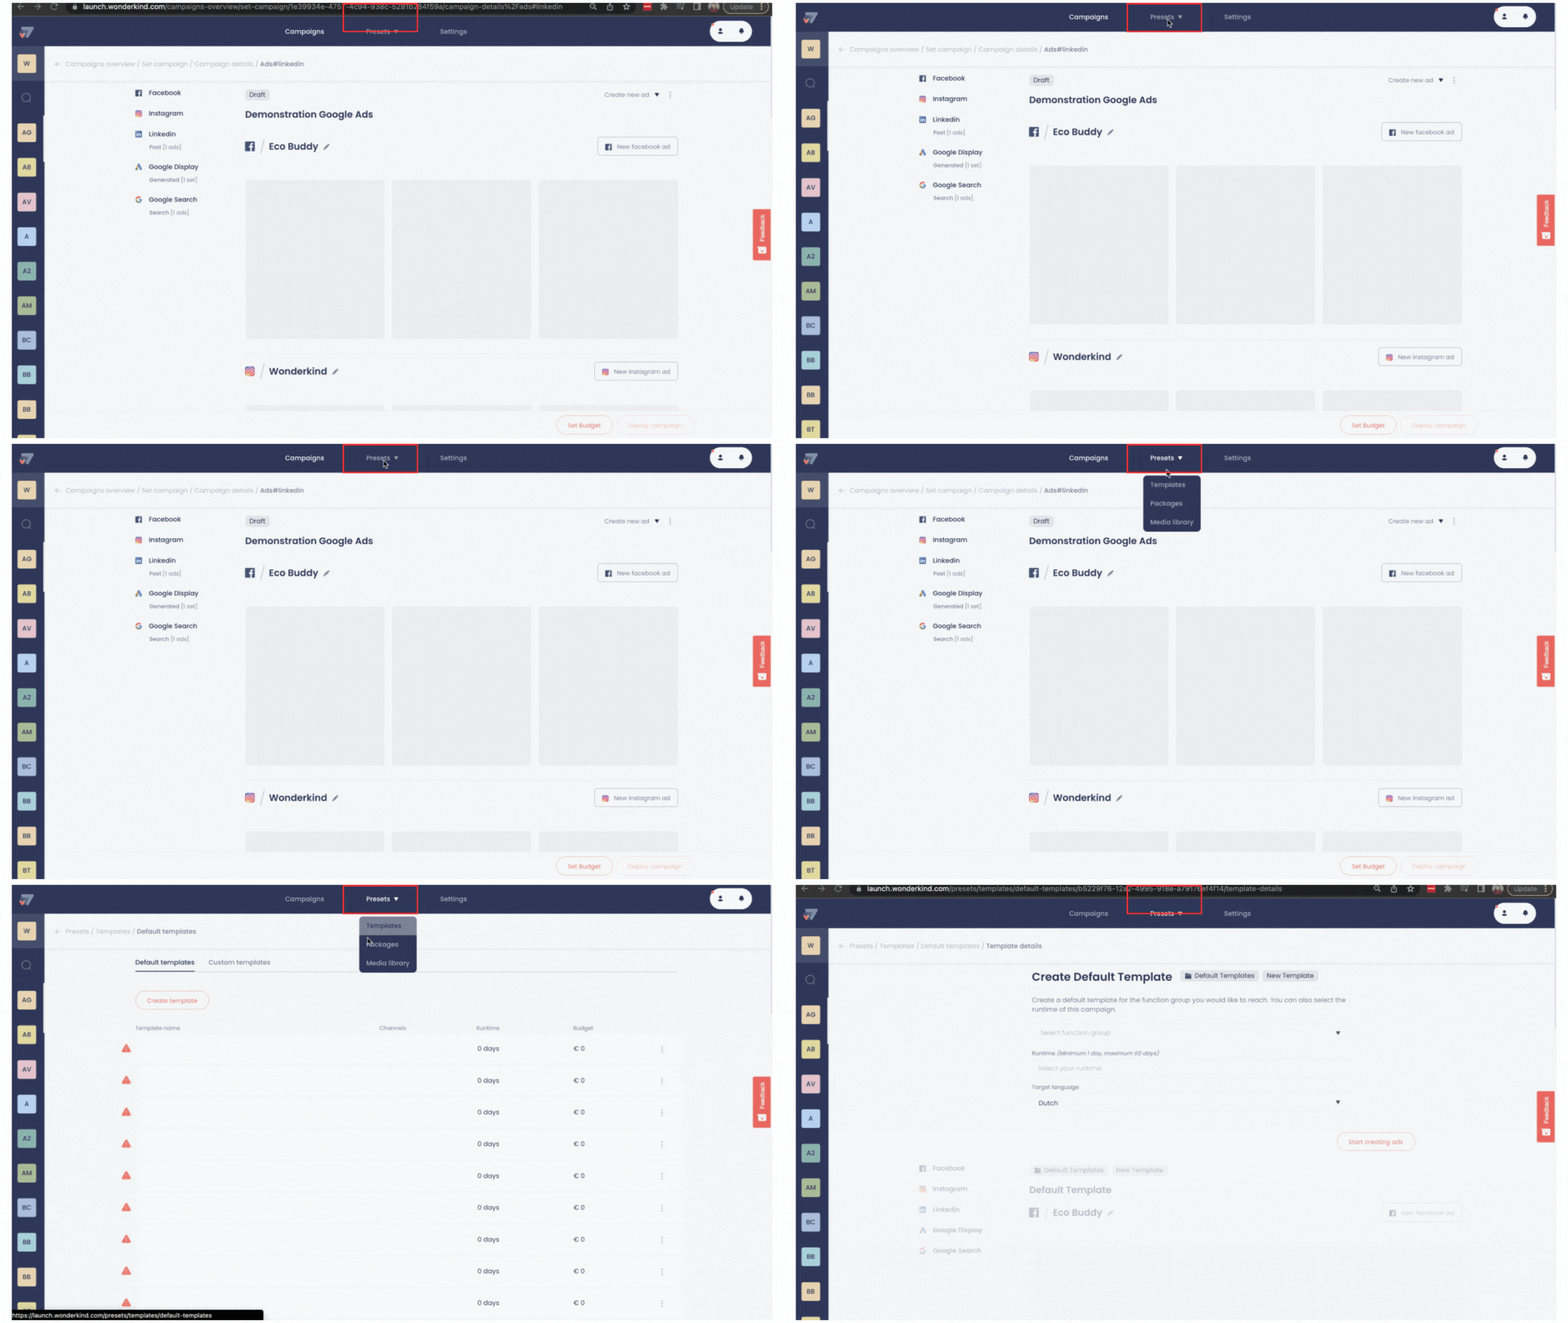
Templates are created and used so that your ads can follow the same format throughout. Templates are useful as they save you from a lot of manual work.
To begin, from your Launch home page, you select ‘Presets’ at the top of your screen and then select ‘Templates’.

You will see that you have 2 options to create either a custom template or a default template.
Default Templates are basic templates with stock photos for a specific function group (e.g Finance, Administrative, etc.), you can use and then edit the parts you want. You can also some basic text per ad using the variables such as %location%. This means the location will be filled in the text for you and you do not have to make any edits.
Custom Templates are created for your specific end client with only the channels they wish to use and the text that they want to have for their campaigns.
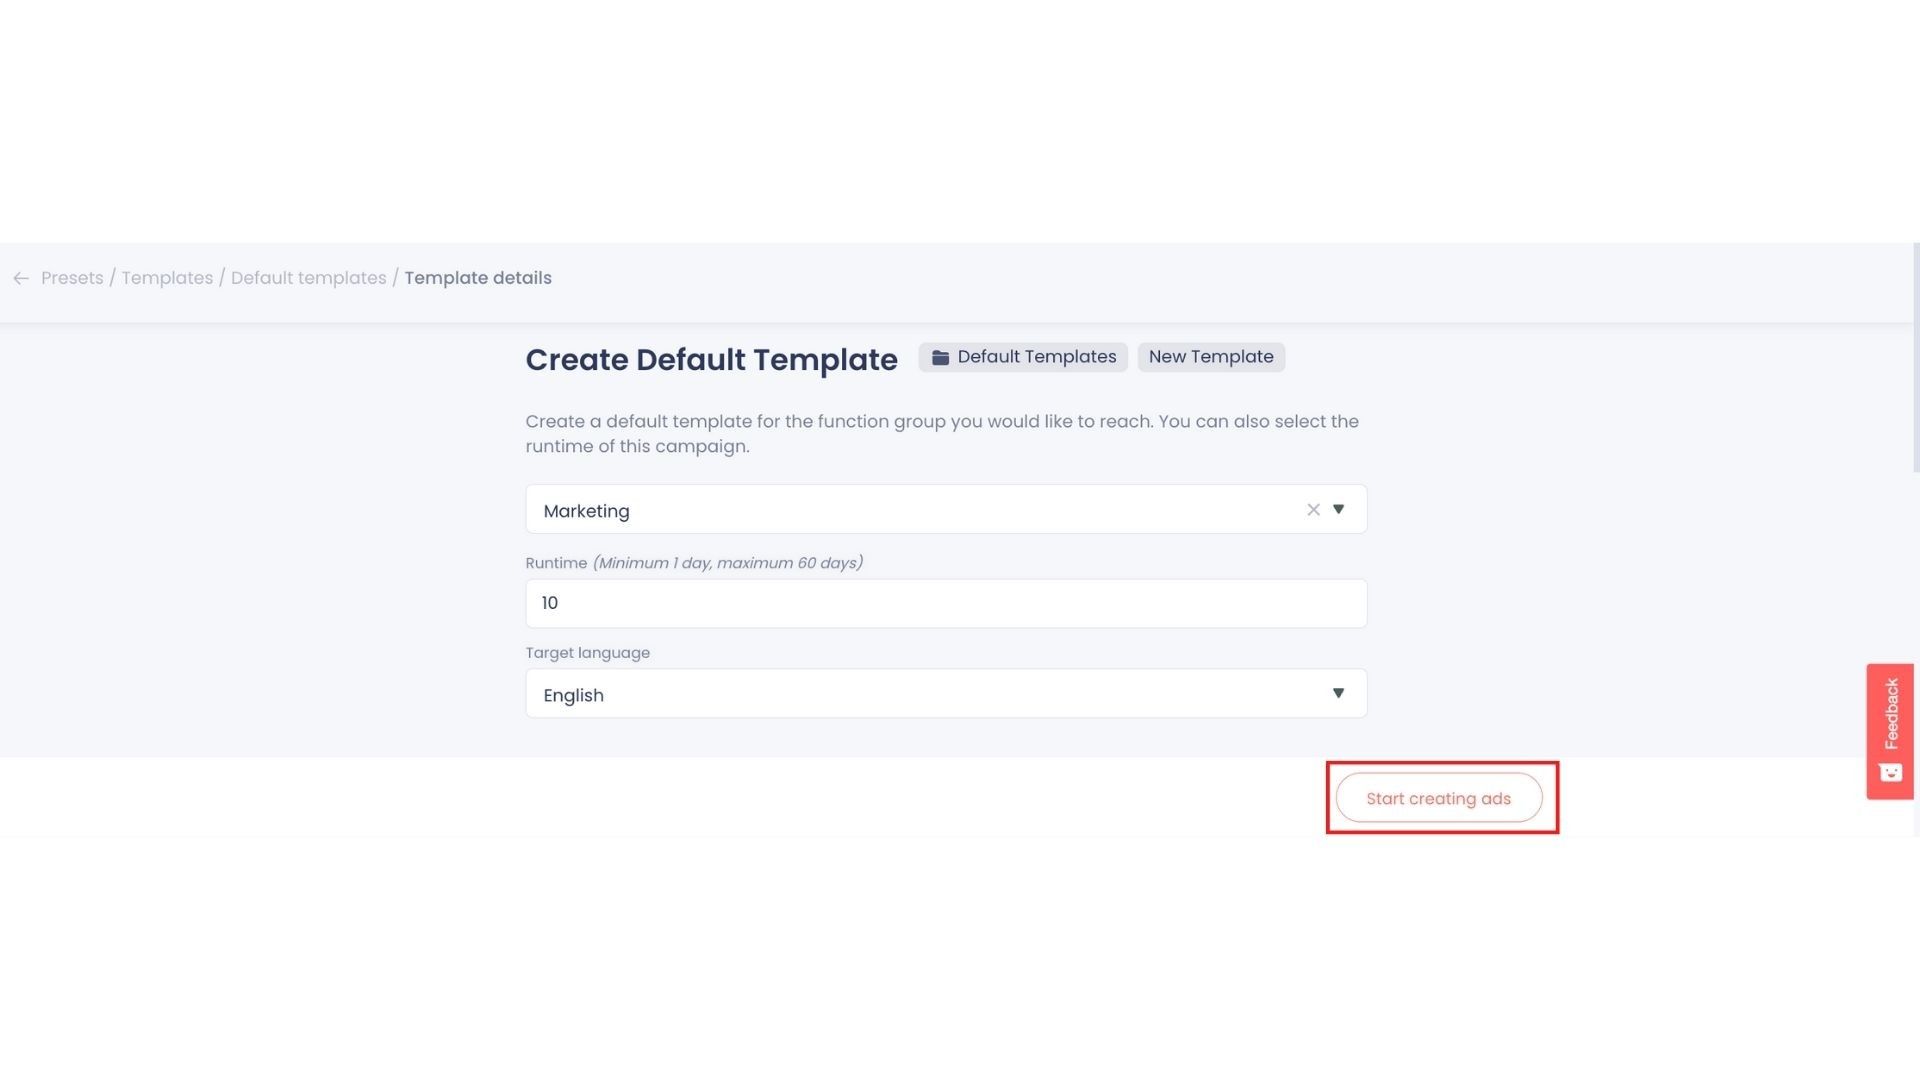
Once you have selected which template you want to use, you fill in the details, and select ‘start creating ads’.

Then, you can proceed with creating the ads for the channels that you desire. If you are unsure on how to do this, you can follow the steps from our 5 articles:
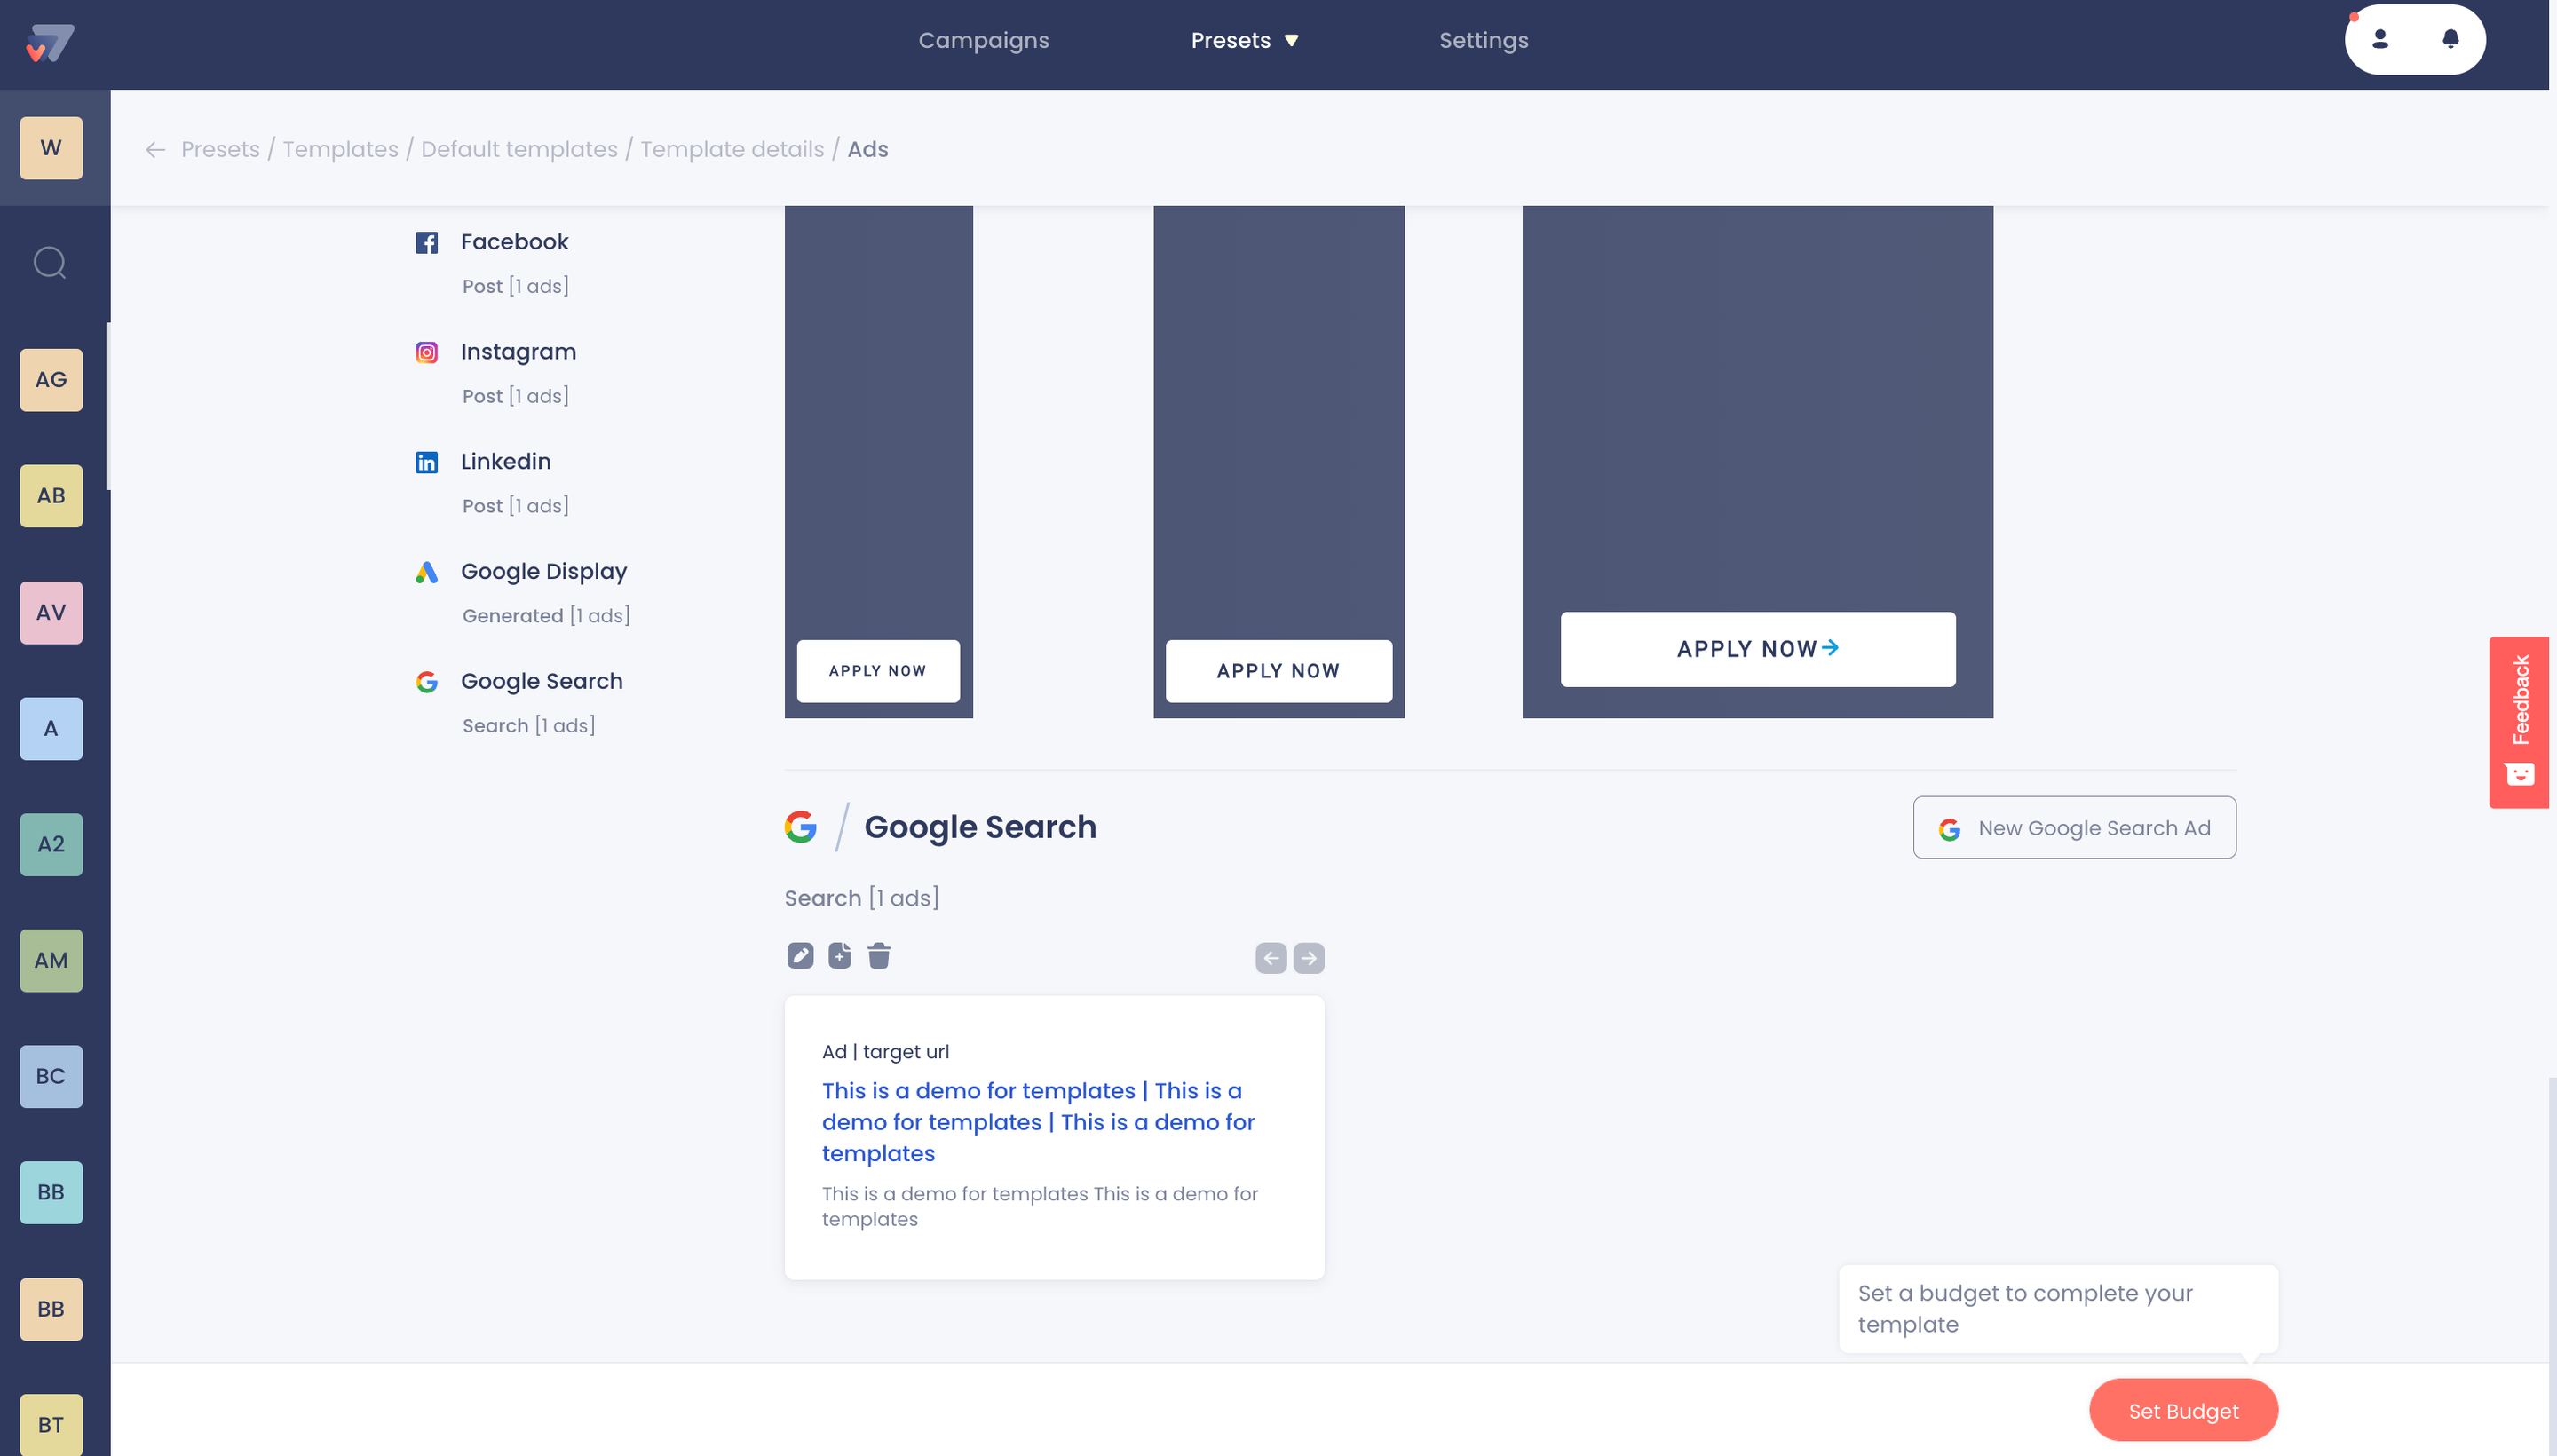
Once you have created all the ads that you need, the final step is to set a budget for your template.

Once your budget has been set, your template is created and ready to use!
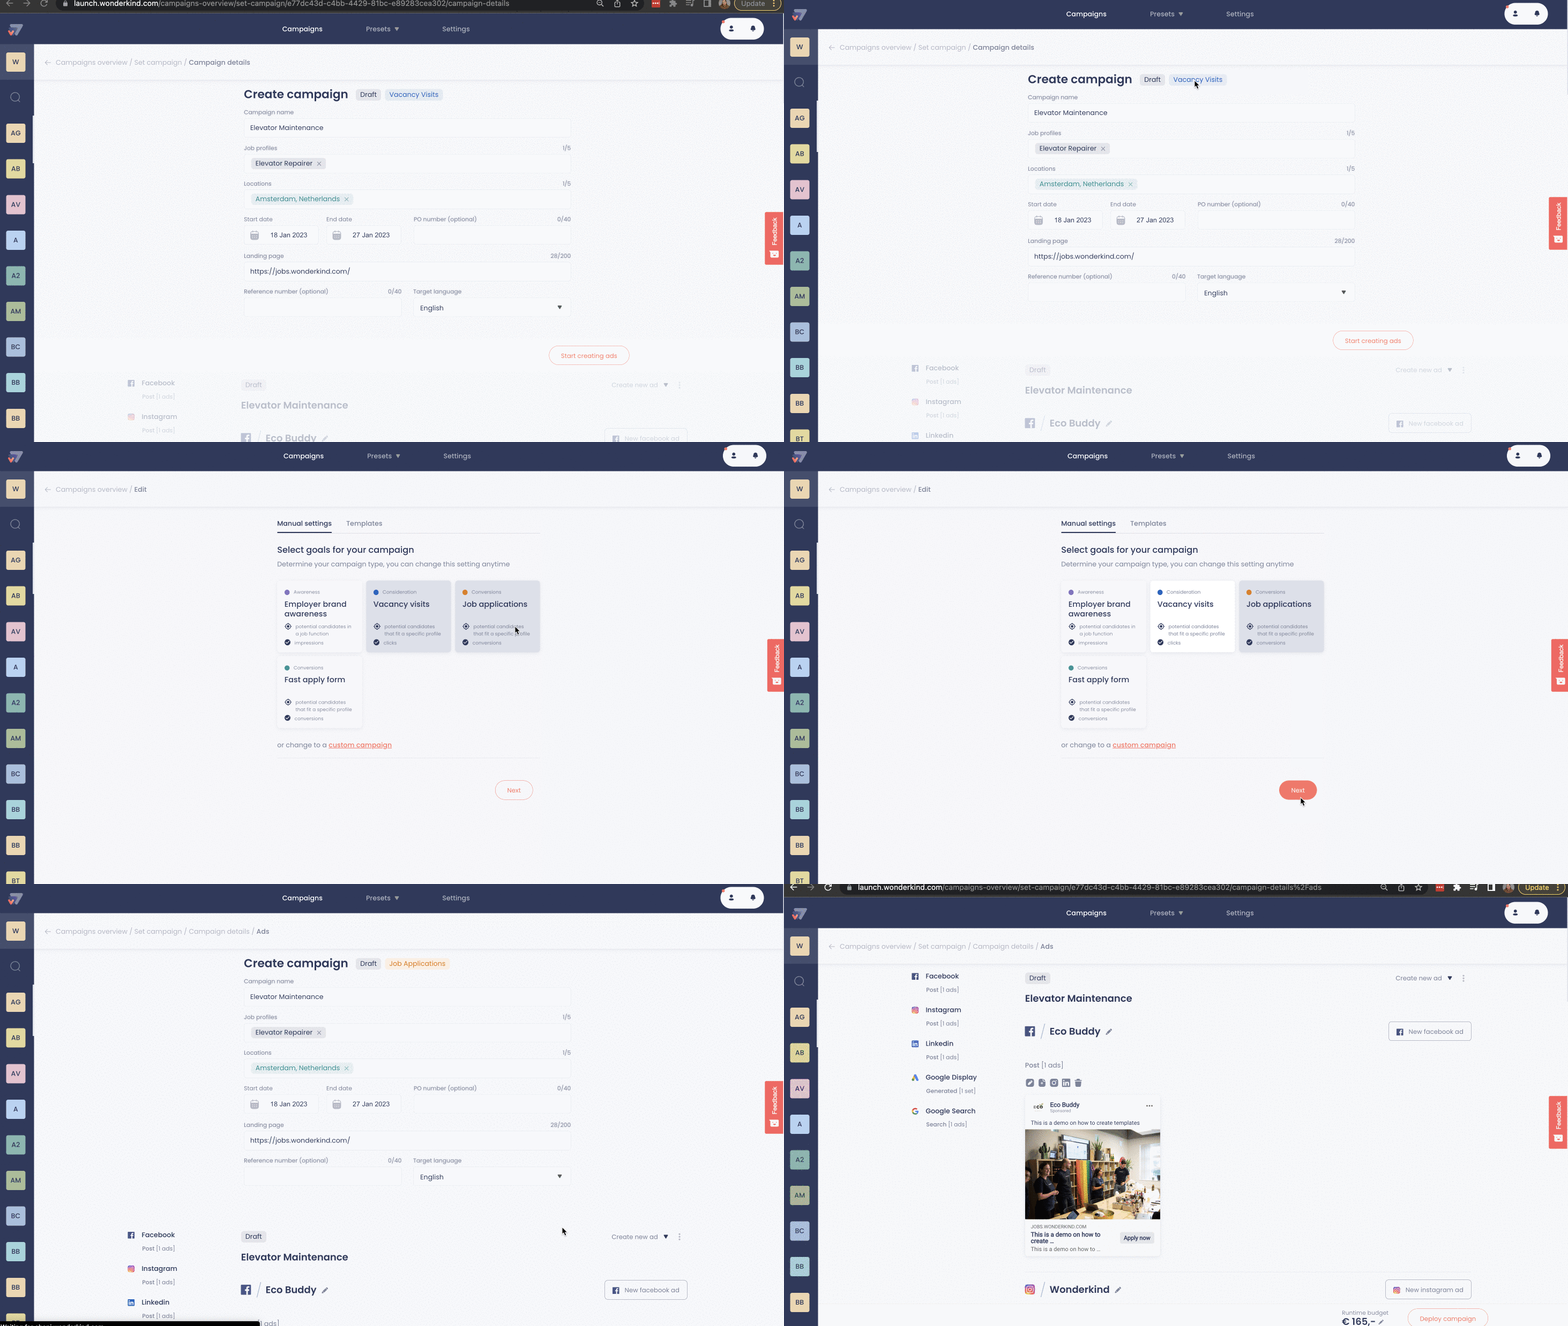
You can use your template during the creation of your campaign. Start by selecting the work space and then click on ‘Create new campaign’. Then at the top, select ‘Template’ and select the desired template.
Then you will be led to fill in the details of your specific campaign. Make sure to double check what goal is selected for this campaign and whether that aligns with your needs.

Once these details are filled in, your ads appear for you to preview based on your template. At this point, you can make changes to the ads, like the logo and color of your Display banners.
After all these steps have been completed, you can go ahead and deploy your campaign!
.png?height=120&name=Group%2010%20(1).png)